
How To Connect Canon Camera To My Computer Wirelessly
INTRODUCTION
Taking photos with your Canon camera is very important, but did you think about how you can edit and enhance those photos perfectly? I suggest you edit images on your PC or laptop for a professional look.
To start the editing process, first you need to connect the Canon camera to the computer and transfer the photos. There are many ways to do this, but you should pick the one way that works best for you.

You can use a camera cord to connect the computer or use a USB. You can also use Wifi, Canon's EOS software, or even the Canon Camera Connect app. If you have an SD card, you can use that to transfer your files over too.
All these methods might seem a bit confusing at first. Don't worry, we'll walk you through how to transfer pictures from canon camera to computer, step by step, in this article.
How to Connect a Canon Camera to a PC
Connecting Camera with Wi-Fi
Using the Canon wireless photo transfer method is an efficient way of getting your files onto your computer because no cables are involved. It's a very quick and easy way of transferring your data, although it depends on which digital Canon camera you have.
First, check if your Canon camera has wireless capabilities. This should be quite simple to figure out; go to the page where you bought the camera and check its features, or open your manual and read what it can do. Once you've established that yes, your Canon camera is wireless-enabled.

steps to connect canon camera with WI-FI:
STEP 1: If you have a Windows OS, find a Canon app for PC which is pretty straightforward method that will immediately access your photos. Apps like Microsoft Photos will read the new device instantly. But if you are looking for a way to connect the Canon to Mac systems, it may be complicated. Since the Mac doesn't have compatible programs available on its OS. So first, figure out which OS you're working with, Windows or Mac.
STEP 2: Make sure your computer is connected to a strong WiFi source, whether that's your home WiFi or your work one, or any other connection.
STEP 3 : Your Canon camera manual should have some tips on how to transfer photos from camera to computer wirelessly. That is, it should have a Canon wireless manual that will tell you what Canon driver you need to install so you can transfer your files. With Windows, this should be a pretty seamless process. But when it comes to how to download pictures from Canon to Mac, you will have to check if the driver is compatible with your Mac OS. If it is, you shouldn't have any issues, and you can proceed with the next step.
STEP 4 : Turn on your Canon camera. Then activate the wireless camera transmission so it can pick up the WiFi signal.

STEP 5 : Your computer or laptop should recognize the Camera WiFi signal, and establish a wireless connection. You may have to wait a bit while your computer processes this, but eventually, a folder of your camera photos should open on your computer.
STEP 6 : Now all you have to do is transfer the images to another folder on your computer. Job done!
Using the Canon EOS Utility/ Canon EOS Software
When it comes to how to import photos from Canon to PC, you definitely need to try out the EOS Utility app. It's a very versatile way of connecting your camera to the laptop or computer and transferring photos, so if you're wondering how to upload photos from Canon Rebel T6 to computer or from any other type of Canon camera, your EOS Utility app will act as a real lifesaver.
The benefit of this app is that instead of transferring all your photos in one chunk, you get to pick which photos you need on your computer. It also has features like remote shooting and remote control of the camera, so it's actually a great idea to become more familiar with this app.
So if you're wondering how to import photos from Canon to Mac and a simple wireless connection didn't work, or even if you need to transfer photos to your Windows computer, keep reading.
STEPS TO CONNECT CANON CAMERA BY USING SOFTWARE:
STEP 1 : Download the EOS Utility software from the Canon website. You should find it listed under 'Support' or a similar subheading. All you have to do is press 'download' and it should be installed on your Mac or Windows as a Canon app for PC.
STEP 2 : The EOS Utility app will ask you to specify where you want the photos to be saved.

STEP 3 : Connect the camera to the computer or laptop, either wirelessly (as we have explained), or by using a camera to computer cable connection. If you're unsure about USB connections, we'll explain that later.
STEP 4 : Once the connection between the camera and the computer has been established, EOS Utility will take over and start transferring the photos you choose to your desired location.
Using Canon Camera Connect app
You might be wondering, it's easy to connect my Canon camera to a laptop or a computer, but what about a phone or a tablet? Well, there is a way, and it's called Canon Camera Connect. While there's no Canon Camera Connect for Windows, you can use it on your iPhone or iPad, or on your Android device.
Canon Camera Connect for Windows doesn't exist yet, because it's not compatible with Windows devices. But with any other phone or tablet, you should have no problems. It's also an app that comes with Canon's stamp of approval if you were worried about using a random app off the internet.
Aside from being a useful app for photo transfer, the Canon Camera Connect app can also be used to control your camera remotely and add GPS data to your files. Handy, right? So let's walk you through how to use this app.

STEPS TO CONNECT CANON CAMERA BY USING APP:
STEP 1 : Go to the App Store or the Google Play store, and search for the Canon Camera Connect app. Check Canon's compatibility list on their website to make sure your camera is compatible with the app.
STEP 2 : Download the app on your Apple or Android device.
STEP 3 : If you have a Canon EOS DSLR, enable Wifi on it, and then select Wifi functions. Before you do this, your camera will ask you to set a nickname, so do that. Once you're looking at Wifi functions, select the icon that says 'Connect to Smartphone', and then select 'Camera access point mode', and then 'Easy connection'.
STEP 4 : On your phone or tablet, go to the settings menu, check your Wifi, and see if the camera's network name has popped up. Connect to it.
STEP 5 : You'll see a message saying your camera has connected to your device. Now open the Canon Camera Connect app, and transfer your photos.
STEP 6 : What if you don't have a DSLR? Don't worry, you can still use the app. Your camera should have a button with a mobile phone icon on it if it's fairly recent. Or, you can press the Wifi icon. Give a nickname to your network, and a mobile phone image should come up. Select it, and the camera's Wifi network should be set up. Again, on your phone or tablet, wait for the network name to come up, and select it.
STEP 7 : Open the Canon Camera Connect app, and you should be good to go.
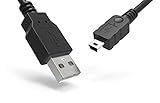
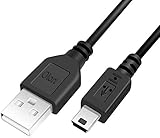
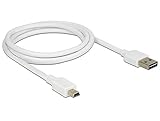
Connect Canon camera to computer via USB cable
You might think that this all sounds easy for newer cameras, but how can you figure out how to connect Canon PowerShot to a computer or any other older camera model that doesn't have a wireless capability? Well, just use the old standby. A USB cord! This is effective for all cameras, whether old or new, so you shouldn't have trouble even if you've got an ancient model.
The great thing is, your Canon camera should already come with a USB cable. In case you lose or damage it, just order a replacement online or buy one from a local shop. They're easy to get hold of. If you are buying one, go for a high-speed USB cable, especially if you've got a camera with cutting-edge technology that takes high-resolution photos.

So how do you use a USB cord to connect camera to computer?
STEP 1 : Check which end of the USB cord goes into your computer or laptop. Plug it in, then plug the other end (the A/V/Out/Digital port end) into your camera.
STEP 2 : Switch on the camera. Your camera should be properly charged before you begin the transfer process because if it runs out of charge halfway, you'll have to start all over again later.
STEP 3 : Put the camera in 'view' mode. Your computer should automatically detect the camera. If you have a Windows OS, some app on your device will easily serve as a Canon camera window app for PC, and the computer itself should tell you what to do next.
STEP 4 : What about how to upload photos from Canon to Mac? Well, your Mac OS should also recognize the plugged-in device, but in case it doesn't, check whether any additional software is required from the Canon website. If there's any Canon camera software for PC specified, you can download it and proceed.
STEP 5 : Choose a location where you can save the photos. Begin the transfer.
STEP 6 : Before you unplug the camera, switch it off. Then disconnect it from the computer. And you're done!
What if your canon camera won't connect to computer or mac won't recognize canon camera
Of course, where technology is involved, things can get a little difficult sometimes. You might face system incompatibility issues, or maybe a certain app just won't work the way you want it to. Let's look at some common problems and work out how you can fix them.
CONCLUSION
Have you been sitting around thinking, how do I get pictures from my Canon camera to my computer? Now you know all about it! Whether you're using the Canon Connect to computer method or looking for how to transfer videos from Canon camera to computer, you should be all set. Problems can crop up every now and again, but trying out different things and self-troubleshooting is the way to go!
FAQ'S
It depends on which method you're using. Wifi methods can cause additional complications, so when in doubt, just go for the plain and simple SD card or USB method. It may take longer, but you'll have your photos on your device in the end!
When it comes to connecting Canon camera to Mac, it's not an unusual issue. Let's see if it can be resolved. First, check if you've got the right software. If that's not an issue, you have to check your Image Capture (go to 'File', then 'Open New Finder Window', and then 'Applications', and select 'Image Capture' where it should list your camera). It's also possible your camera isn't accepting USB cables.
In which case, go to the camera settings and disable 'Wifi/NFC' or 'Wifi Only'. Additionally, keep your Mac charging while you're transferring photos if it has medium to low charge. A large volume of high-resolution photos might cause connection issues if the laptop doesn't have enough charge. If Mac won't recognize Canon camera settings even after all this, it might help to contact Canon's tech support.
Again, make sure Wifi/NFC settings are disabled. You can also try another USB port, or try unplugging and replugging the camera. Also, update your USB drivers just in case. If the Canon camera Window app for PC still won't show up, you can try uninstalling the camera in the Device Manager and plugging it in again. Then scan for hardware changes, and see if the right apps come up. Sometimes a simple shake-up like that can work.